Ultimate Guide to RV Detailing
Buying an RV is a considerable investment, and you’ll want to be sure to put time and effort into keeping it shiny. Cleaning and protecting your recreational vehicle will increase its longevity significantly. One of the best ways to protect your new investment is RV detailing.
Whether you’re DIY or hire a professional detailer to do the work, here’s what you have to know about getting your recreational vehicle fresh and clean.
RV Detailing San Diego
Mission
Its ultimate goal is to keep your RV in as prime of a state as possible for the entire duration of your ownership. This is a meticulous process that needs all the right cleaners, wax products, and a massive amount of information on dealing with a metal’s biggest foe, corrosion.
Benefits
Detailing your RV can have multiple benefits, including.
- Longevity – Washing and waxing an RV will help protect the exterior from the weather. It’ll also allow you to see small scrapes and dents easier. It’ll enable you to repair the areas before they become bigger problems. A small hole in the side of a dirty coach might go unnoticed, but you won’t be able to miss it once your rig is clean. Cleaning the inside will extend the interior’s lifespan as well;
- Health – A clean interior is also healthier. Traveling around the USA is great, but it does expose you to a lot of germs you may have otherwise avoided. Now they’re inside your motorhome. A recreational vehicle detailing will help you eliminate these germs efficiently;
- Resale value – It’s hard to take pride in and respect a dirty RV. If you don’t respect it, you might not take care of it as well. The enhanced pride of ownership you’ll feel after getting your RV detailed will help you avoid this issue. Your fully detailed coach will look better. It’ll increase the resale value, and you’ll get more money to put towards your next coach.
How to Detail an RV
Below are all the steps necessary to clean and recondition an RV, from roof cleaning to the final exterior dressing process

1. Roof cleaning
Detailing starts at the top, so the first step is to clean the recreational vehicle’s roof. Use Aero Cosmetics Belly Wash, or similar solution and its Aero scrubber tool spray the cleaner onto a small 3-square-foot area. Then, use the scrubber tool to remove the dirt, and wipe dry with a clean towel. Repeat this action until the entire roof is clean.
2. Washing
Spray the motorhome entirely with water. It’s best to wash the coach in the shade if possible. After wetting, use a house-mounted foam gun that produces a lot of suds when used with a high-quality soap such as Chemical Guys CWS_301 Citrus Wash. The high level of suds is vital to lubricate the surface and float the dirt off the paint during cleaning.
Next, take a pole-mounted fiber or microfiber mitt such as a Lambs wool Wash Mitt. Carefully brush or wipe a small area at a time, beginning at the top and working your way down. Then rinse completely before moving to the next spot.
3. Clean awnings and slideout covers
Awnings and slideout covers get dirty, so they must be cleaned regularly. For the fabric awnings, use Chemical Guys Convertible Top Cleaner. It’s made explicitly for car tops and works excellent on awnings while remaining gentle on the paint.
In this phase, you need to wet the awning, then spray on the cleaner. Then, use a soft-bristle brush or foam sponge to clean the awning or slide-topper thoroughly, and rinse completely. Repeat it on all awnings and slideout toppers.
4. Clean the front from bugs
Bug removal on the front of the RV is another operation that must be done regularly. If you choose a waterless method of bug removal, use Griot’s Garage Bug and Tar Remover and spray directly on the surface. Then scrub the surface with the Griot’s Garage scrubber pad and wipe dry with a clean microfiber towel. This bug remover is excellent when you’re on the road or if you don’t have access to rinse water.
5. Tires and wheels
The next phase is detailing the tires and wheels. The tires need to be cleaned with a product made only for tires and then protected with a UV-rated protectant spray. The wheels also have to be cleaned and polished.
Since motorhome tires typically age out before they wear out thanks to tread wear, it’s pivotal to use products made just for tires. Use Black Magic Bleche-Wite Tire Cleaner and a brush or stiff sponge to wash away road grime and dirt. For the wheels, use Sonax Wheel Cleaner and a microfiber or foam sponge.
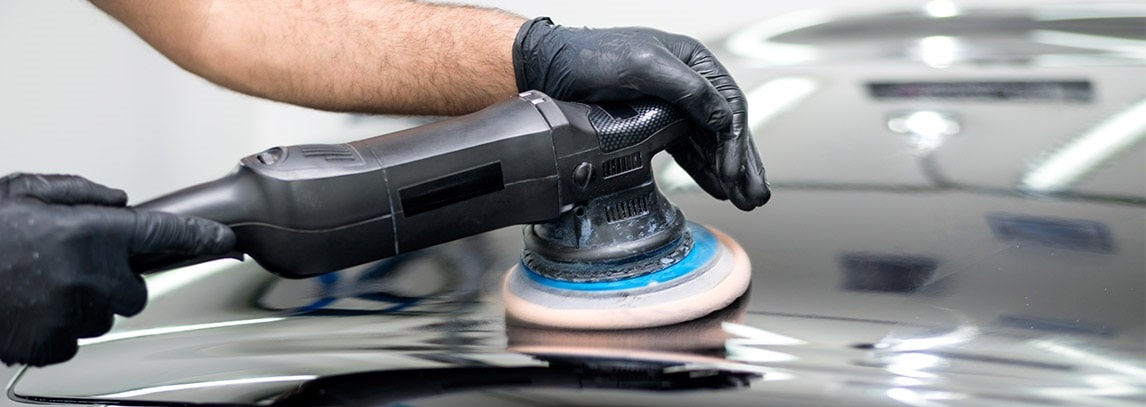
Once the wheels are clean, they need to be polished to a high gloss. For this purpose, use Meguiar’s G4400 Hot Rims Wheel Polisher. When combined with the Griot’s Garage Foam Polishing Pad attached to a cordless drill and a roll of paper towels, you can easily create a great-looking shine in 30 minutes per wheel.
After the wheels are cleaned/polished, it’s time to apply a rubber dressing product such as Aero Cosmetics Tire Protectant and Dressing on the tires to protect them from UV rays.
6. Glass cleaner and sealing
Spray Meguiar’s Perfect Clarity Glass Cleaner the glass completely inside and out using paper towels, a new microfiber towel or old newspaper pages. If there are hard-water deposits or etching on the glass, you may need to tackle it with a buffer or by hand polishing with a product like Meguiar’s Water Spot Remover.
Once the glass is squeaky clean, use a TriNova Windshield Rain Repellent spray to make driving in the rain a lot easier. The application of this product will make the water bead up and roll off the windshield, significantly increasing visibility.

7. Waxing
Take the Meguire’s Ultimate Wash & Wax (best RV wax) and apply it to your large sponge. You don’t need a lot of product. And make sure your sponge is damp. Apply the wax in a big circular motion.
When you get down here, go with the body panels. Then move to the big areas, apply big circular motions, and overlap the area that you put the wax on. However, on the fiberglass surface, use a little more product since fiberglass tends to soak up.
Let the wax dry, it’s going to take a couple seconds here. Now that it has dried to a light haze, the RV has soaked up the wax. And that’s what you want.
What’s left on the outside is a residue from work. You’ll simply take it off until the cleaning surface becomes nice, shiny, and smooth.
Note – It’s important to know that if there are problems such as extreme deterioration or oxidation, you shouldn’t try to detail an RV yourself since you may not have the knowledge, materials, or equipment for that undertaking like a pro.
Do I Need to Wax My RV?
RVs are all covered in either fiberglass, plastic, gel-coated fiberglass, or clear coat paint. All of these materials oxidize when exposed to the elements. The more they oxidize, the worse they look, and the more brittle they get. Waxing your motorhome ensures it’ll stand the test of time.
You have two choices; you can wax the vehicle, or you can seal it with a paint sealant. There are two main differences between a sealant and a wax. Wax contains natural compounds and has a relatively short lifespan on an RV – a couple to a few months. A sealant contains mostly synthetic compounds and has a relatively longer lifespan – several months to a year.
What is the Best RV Wash and Wax Product?
The best and easiest product to wash and wax your recreational vehicle is a Meguire’s Ultimate Wash & Wax. This product will save a huge amount of time and will enhance your waxing.
Most of the other products don’t make enough suds, and some leave a haze behind once they dry. Meguire’s won’t haze. It also generates a lot of suds, which lets you clearly see where you’ve been and where you have to go.

RV Detailing Tips
Here are 10 useful motorhome detailing tips that may help you make your coach clean and neat.
- Clean the inside/outside of the windshield – Pour a teaspoon of dish detergent with a bit of vinegar to a warm pot of water. Sprinkle the solution on a clean cloth and wipe the entire surface. Dry as needed with a dry cloth. Clean the outside windshield with a Meguiar’s Perfect Clarity Glass Cleaner, and clean cloth;
- Remove all bugs from RV’s front – Spray on a bug remover such as Turtle Wax Bug And Tar Remover on bug covered surfaces and wipe them off;
- Eliminate odors from the interior – Sprinkle baking soda on carpets, cloth furniture, and generally throughout the interior. Leave overnight and vacuum up;
- Carpet– Remove and spray these surfaces with a CarGuys Premium Super Cleaner. Then, wash them with some laundry detergent for the best results;
- Leather and vinyl seats – Use the Leather Honey Leather Cleaner to scrub the dirt away with ease and restore the original bright color;
- Wiper blades – Fold out wiper arms to access blade edges. Wipe blades using rubbing alcohol and fold wipers back onto the windshield. They’ll no longer streak on the glass.
- Vents, switches, and seams – Using a silica gel, press on and pull off. Dirt and dust will adhere to the putty. Handwork and reuse;
- Dash components and crevices – Using a toothbrush is excellent for getting perforated seats and trim clean;
- Cup holders – Place an old sock over a cup. Spray the sock with Windex. Insert the cup into the holder and rotate. Take off the cup, leaving a clean, fresh-looking cup holder.
RV Detailing Prices
Getting RV washed and waxed will cost between $150 – $200. Having the interior cleaned will cost between $50 – $150. This makes the average cost of having a recreation vehicle completely detailed between $200 and $350.
Mobile RV Detailing San Diego Leader
If your recreational vehicle needs detailing, you’re in the right place! As the most reliable San Diego Detailing service, we supply everything, from spot free deionized water to electricity – even our state-of-the-art ozone generator! From RVs to boats, we do it all with special attention to detail!
If you have any questions about our reputed RV detailing services, please contact us.

